Send a mockup for approval
Attach a mockup or proof to an item on an order, send the order to your customer, and get their approval on record before anything is made.
A made-to-order job usually waits on one thing: the customer saying yes to the artwork. This walks through the whole loop. You attach a mockup to the item it belongs to, send the customer one link, and they approve the order and its mockups together. What they approved is kept on the order, with the date and their name, so nobody has to go looking through email for it.
Nothing reaches the customer until you press send, and nothing is placed in Shopify until they approve.
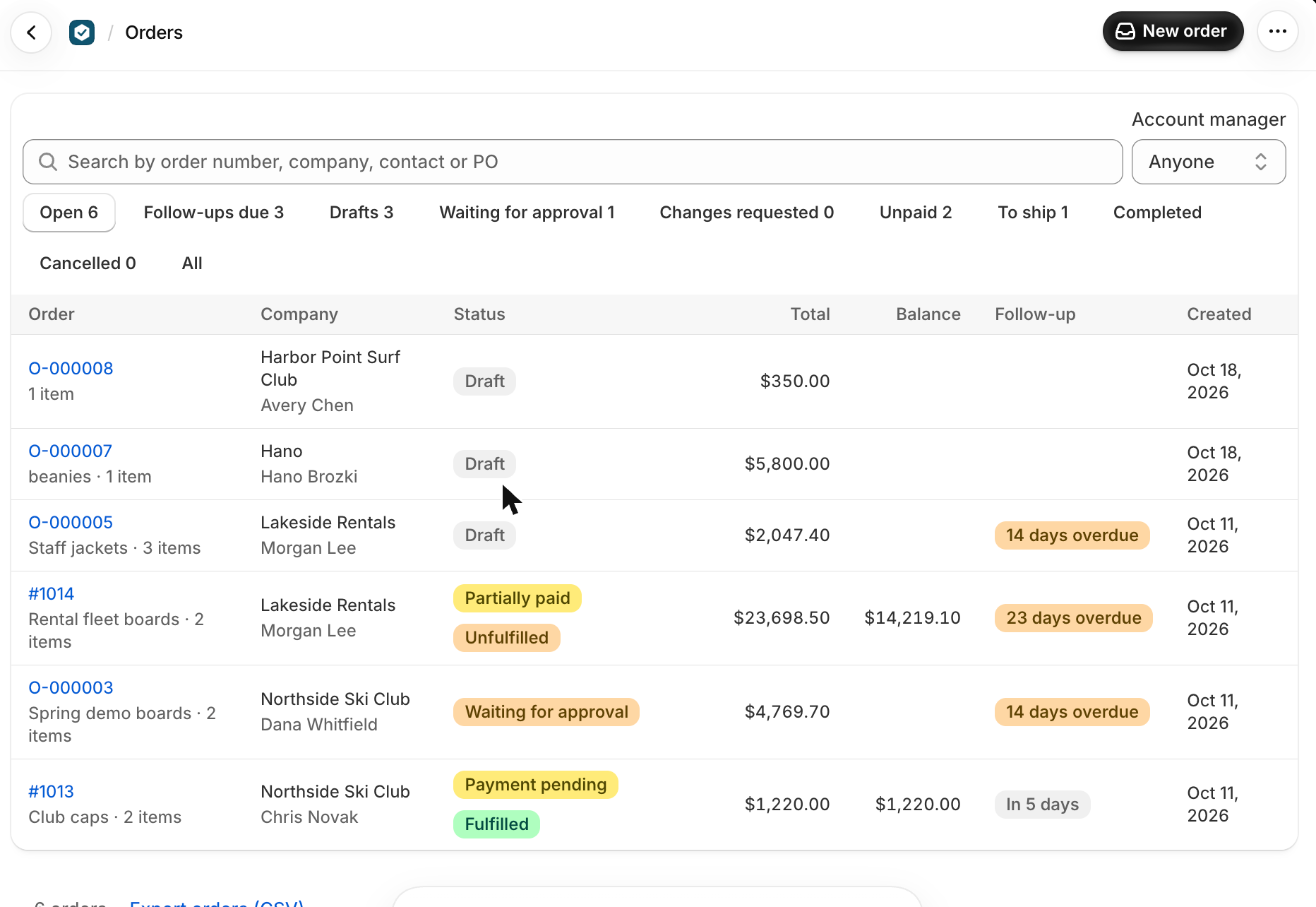
1. Open the order and find the item
Open the order from Orders, or press New order and build one. Every item on the order can carry its own mockup, whether it came from your store or you typed it in as a custom line.
On the item's line, press More. That opens the fields that are hidden until you need them.
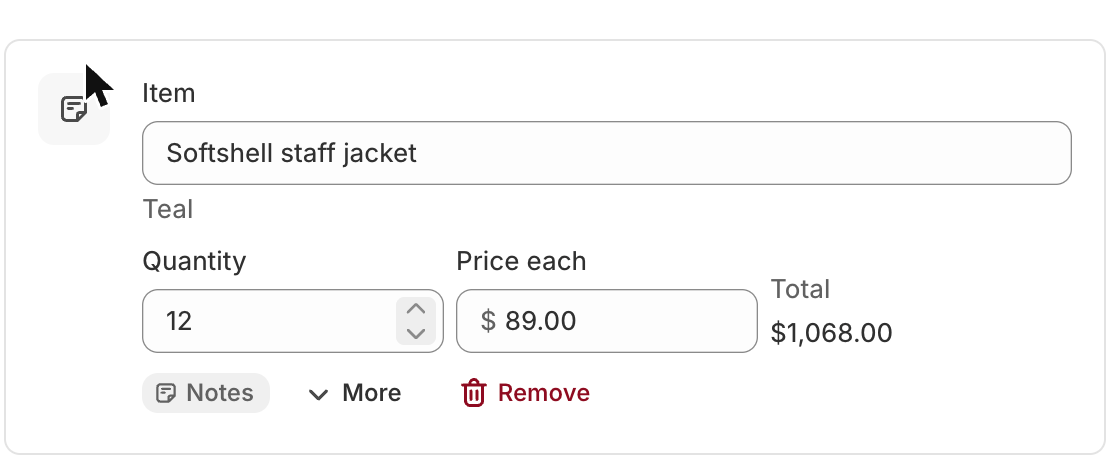
2. Attach the mockup
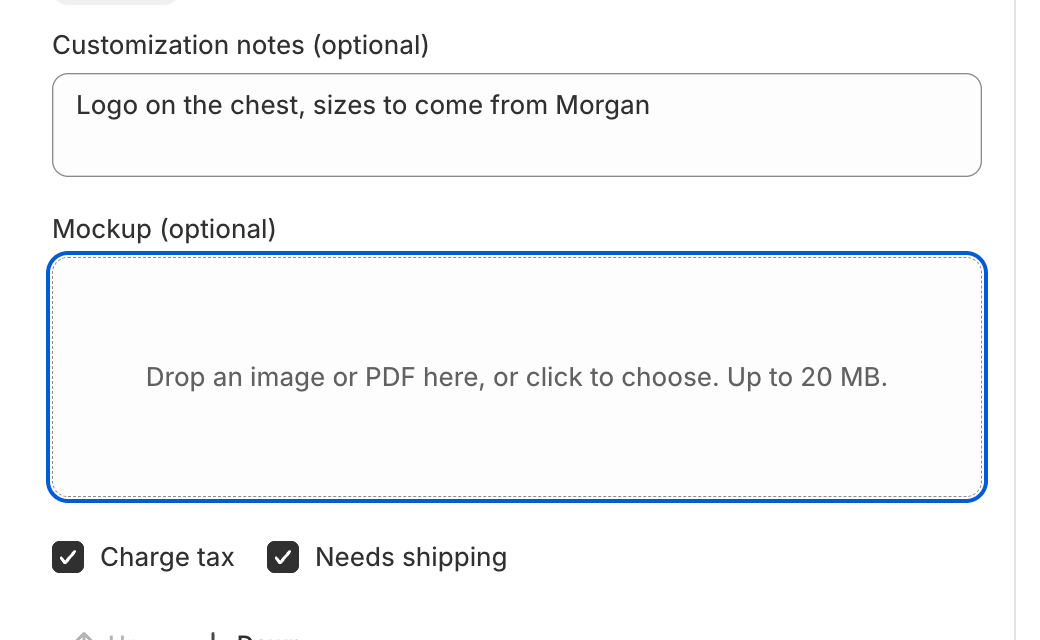
- Drop your artwork into Mockup (optional), or click the box and choose the file.PNG, JPG, WEBP, GIF or PDF, up to 20 MB. One mockup per item, and any item can have one.
- Type anything the customer should read alongside it into Customization notes (optional).Placement, thread colours, sizes still to come. It prints on the item's line and the customer sees it next to the mockup.
- Press Save.
Mockups are kept in your store's Shopify Files, the same place as the files customers send through your forms. They stay there if you ever uninstall the app.
What the file can be
- PNG, JPG, WEBP, GIF or PDF, up to 20 MB.
- One mockup per item. An order with eight items can carry eight.
- Any item can have one, whether it came from your store or you typed it in as a custom line.
- It is kept in your store's Shopify Files, beside the files customers send through your forms, and stays there if you ever uninstall the app.
3. Send the order
- Press Review and create order.Shopify works out the tax and the total, and you see the customer's page exactly as they will.
- Check it, then press Create order.
- Press Share, then Copy link, or Email to write to them from your own email app.If the order asks for a 4-digit code, send that with the link. The code is on the order.

Once it is out, the order says who it is waiting on. Preview shows you their page again at any time, and Record their approval is there for the customer who phones instead.
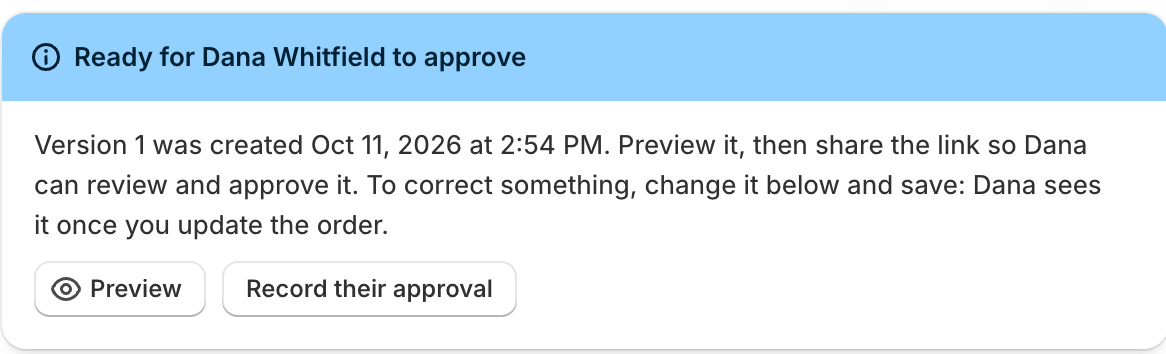
4. What the customer does
They open the link on your own store's address, with no account and no password. The link is the key. Each mockup is shown full size next to the item it belongs to, with your customization notes under it, along with the quantities, prices, shipping, tax and the terms they are agreeing to.
To approve, they type their full name, tick the box and press Approve order. Or they press Request changes instead and write what is wrong, which brings the order back to you marked Changes requested with their message in Notes and a follow-up due straight away.
They approve the order as a whole, with its mockups. There is no way to approve one item and hold another, which is deliberate: what they agreed to is one version of one order, and that is what the record has to show.
If the order carries a 4-digit code, send it with the link. Five wrong tries lock the page, each time for longer. Someone who already opened it with the right code is not locked out.
After approving they pay from the same page and download the invoice.
When they approve, the order is placed in Shopify with payment pending under its terms, and from then on it goes by its Shopify number. Until that moment nothing is in your Shopify Orders at all.
If they approved by phone or email instead, press Record their approval, type their full name, choose By email, By phone or In person, and press Record approval. The order is placed the same way, and the record says it was you who entered it.
5. The record of what was approved
The order's Approval card names the version that was approved, who approved it, how, and when. Every version is listed with what changed in it. That is the document to reach for when a customer says the logo was meant to sit lower.
What trips people up
- A price you type is kept as a Custom price. Use the catalog price puts the catalog's back.
- Every line and price can be corrected until the buyer approves. Once they have, use Edit order: the change goes back to them.
- If the buyer approves by phone or email instead, press Record their approval and type their full name.
- If Shopify's total changes before they approve (a tax rate change), they're asked to approve the new total.
- The page is on your store's own address and needs no login: the link is the key.
- With the 4-digit code, five wrong tries lock the page, each time for longer. A buyer who already opened it with the right code isn't locked out.
Check you have it
The buyer says yes on the phone. What do you do?
Press Record their approval, type their full name, choose By phone, and press Record approval. The order is placed in Shopify.
Short answers on this
- How do I build an order?
- How do I add a mockup or proof to an item?
- Can I change a mockup after the buyer has the order?
- Can a buyer approve only some items or mockups?
- Where are mockups and uploaded files kept?
- How do I send an order to the buyer?
- When does the order appear in Shopify?
- The buyer approved by phone or email. What do I do?
- Is there a record of what the buyer approved?
- The buyer asked for changes.
- How do I change an order after it's approved?
- How do I give a discount?
- How do I repeat an order?
- How do I cancel an order or give a refund?
- What do the order statuses mean?
- What are numbers like L-000001 and C-000001?